twoColumn twoRight handbook
Tables
Inserting Tables
- In Edit mode, scroll down your page to the desired section where you would like to place a table. e.g. on a new line after a paragraph of text.
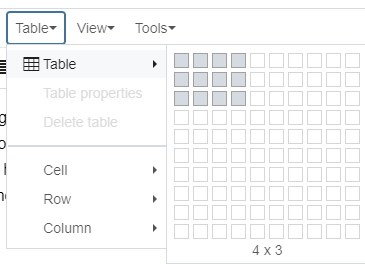
- From the Table menu hover over Table and select the number of rows and columns you would like to include in your table. Click to insert into your page.
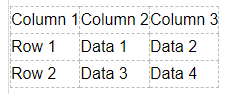
- Add your content to the blank table cells.
Formatting Tables
To create a data table:
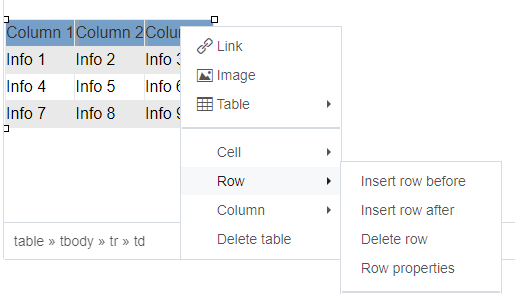
- To add a header row to your table, highlight the header row, right-click on the table and go to Row, then Row Properties.
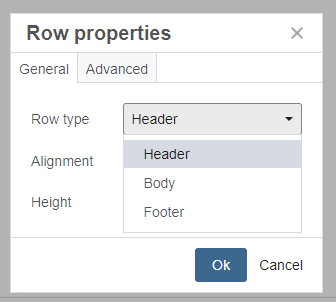
- Select Header from the Row Type drop-down
- Next, right-click the table again with header row still highlighted and go to Cell, then Cell Properties. Select Header Cell option from Cell Type drop down.

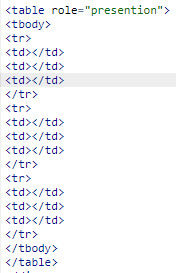
To create a presentation table:
- Find the source code icon to view code, then find your table.

- Add role="presentation" at the beginning of the table.
Styling Tables
- With the table selected, click on the Formats drop-down, then Custom, then select one of the table color style options.

- To edit spacing, width, etc., click on table to find table properties.
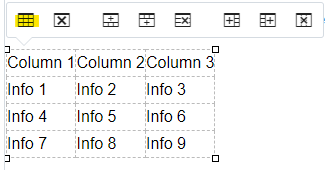
Table Styles
Table-blue
| Column 1 |
Column 2 |
Column 3 |
| Item 1 |
Item 2 |
Item 3 |
| Item 4 |
Item 5 |
Item 6 |
| Item 7 |
Item 8 |
Item 9 |
|
Table-gray
| Column 1 |
Column 2 |
Column 3 |
| Item 1 |
Item 2 |
Item 3 |
| Item 4 |
Item 5 |
Item 6 |
| Item 7 |
Item 8 |
Item 9 |
|
Table-cyan
| Column 1 |
Column 2 |
Column 3 |
| Item 1 |
Item 2 |
Item 3 |
| Item 4 |
Item 5 |
Item 6 |
| Item 7 |
Item 8 |
Item 9 |
|
