twoColumn twoRight handbook
Creating New Pages
Adding a New Page
Scroll to the folder or subfolder within which you need to work and click on it.
- Next click on the Add Content link in the top navigation bar.
- A window will appear showing the different types of content available for you to create.
- Pick the Page option.
A description of the types of pages can be found on the layout page.
Setting Up for Pages
All page types have a similiar inital setup. Editors must decide on a URL, folder placement and the heading for the page.
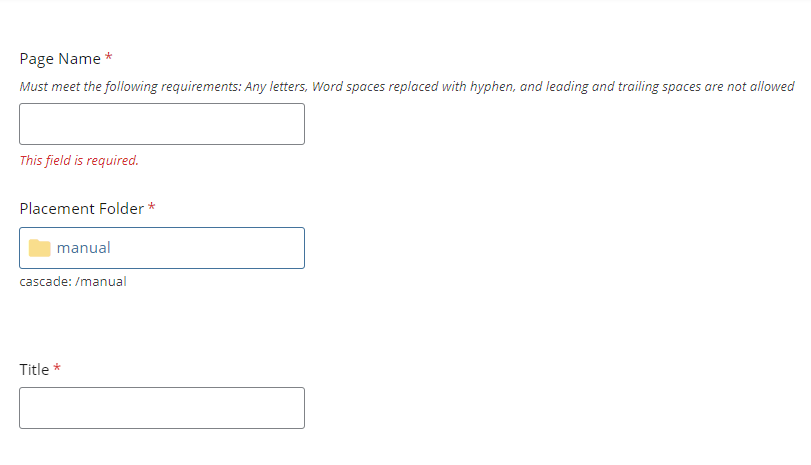
Page Name: The "Page Name" will be displayed in your URL.
Example: https://unf.edu/cascade/manual/index.html
Your display name should follow these naming conventions:
- Lowercase letters only
- Words separated by hyphens, not spaces or other special characters
- No leading or trailing spaces
Placement Folder: This allows you to select the folder where the page will be stored. Click on "choose" at the top right hand corner once a selection is made.
Title: Name your page within this field. The title is your Heading One (H1). It's important that whatever name you choose be meaningful.
Editing Your Content
The Text Editing Area functions much like other word processors you're familiar with using. Below is a brief list of the tools available to you under the different dropdown menus.
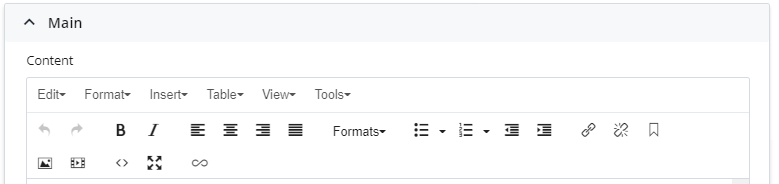
- Edit: Undo, cut, copy, paste, paste as text and select all options can be found here. If you are cutting and pasting from an already published or written page, pasting as plain text is recommended.
- Format: Bold, italic, underline, strikethrough, superscript, subscript, a "formats" menu, and clear formatting can be found here. Examples of the formats are on our Styleguide page.
- Insert: Link, anchor, image, media, special character, horizontal line, and the date/time menu can be found here.
- Table: Table, table properties, delete table, cell, row, and column can be found here.
- View: Visual aids and show blocks options can be found here.
- Tools: Info, spellcheck, source code, and full screen are located here.
Saving and Publishing
After you finish inputting your content, you have the following options:
- Preview Draft: saves your work.
- Comments: leave notes for other editors in your department.
- Check Content & Submit button: Cascade will run a spell and link check.
- Submitting is not the same as publishing. To go live, you will need to hit the Publish button.
|

|
You can also publish your entire folder (every page, image and file) at once by right clicking on the top level folder and selecting "Publish" from the options.
Please note this step is necessary whenever updating any blocks in your setup folder.
|
